NOTA BENE
11
RELEASED DECEMBER 23, 2015
|
|
The new bottled version of NB + Wine contains all that you need to run the worlds most advanced research and writing system on Macs there is no need to purchase Crossover, or Parallels, or VM Fusion (both of the latter which also require Windows) or any other software. A simple download of a single Nota Bene program will give you a full Nota Bene, in which almost all of Nota Benes features should work.
See the general Mac page and the Mac FAQ for details.
|
COMMENTS FROM USERS
I have only just begun to put NB+Wine through its paces and am very impressed indeed! In general, [it] is a superb accomplishment. Congratulations on having pulled it off with such outstanding results.
The Mac version runs excellently on my computer, and I am so thankful to begin my doctoral work with this great program.
By the way, I wrote a colleague of mine about the availability of the new "bottled" version of Nota Bene for Wine and he reported back that he was buying a Mac that very day. It's ..., a long-time Nota Bene user who has written three books with the program. He's been holding off on the switch to Mac, awaiting this moment.
I just bought the new 10+ wine version and I congratulate you on a very polished operation.
|
|
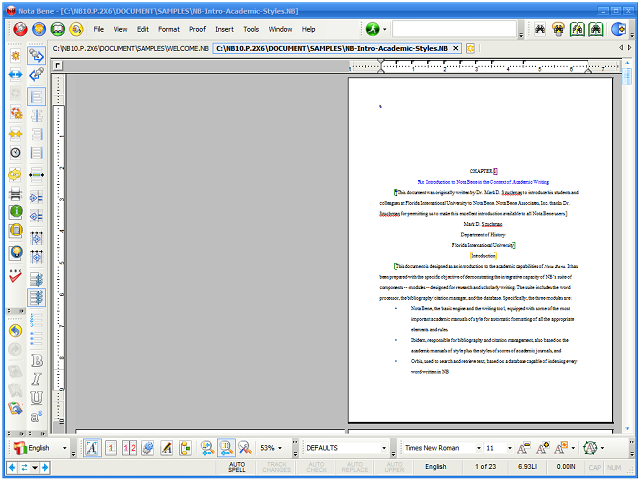
Page-layout view now shows page centered on screen, with proper page borders
- This is the new default view, but you can use the original NB for Windows style if desired
|
3. Side-by-Side Page View
|
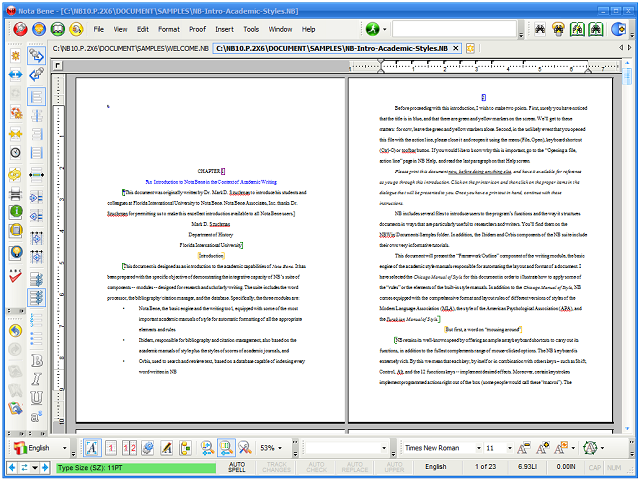
Standard mode first page of document is on the left, even if it is odd-numbered page; focus is on editing with two pages shown side-by-side, and not with final printed composition
Book/Publication mode (showing same document as above) first page of document, typically odd-numbered, is on the right, so that successive pages show actual printed spreads, with even-numbered page on the left, and odd-numbered pages on the right
NB 11 includes a trend-setting implementation of side-by-side pages:
- Shift+F2 shows two pages side-by-side (Shift+F5 returns to single-page view)
- Every Nota Bene feature is available in this view there are no restrictions of any kind
- There are two modes:
- Standard mode first page is always on the left, so that two pages are shown side-by-side, regardless of starting page
- Book/Publication mode first, odd-numbered, page begins on the right, with successive spreads showing even-numbered page on left, and odd-numbered page on right, as in printed book
- You can toggle between these modes using Shift+F2
- You can advance backwards and forwards through the file in two ways:
- Two pages at a time (Ctrl+PgUp/PgDn) every view shows another two pages
- A single page at a time (Alt+PgUp/Dn) this slides through the document one page at a time, with (to take the case of forward movement through the file) the page on the left disappearing, the page on the right moving to take its place, and a new page replacing the one just moved to the left, thus making it easy to view transitions between all pages
|
|
COMMENTS FROM USERS
The side-by-side view is a most welcome new feature. It is extremely useful, especially when editing near-complete manuscripts. It will soon be impossible to imagine how I ever lived without it. The different options for what's on the left and on the right are nice, too.
The two-page zoom view is one of the most user-friendly new capabilities the program has made in years, kid you not. I cannot tell you how much more efficient it is to be able to observe a document more comprehensively. The brain just likes it so much more than the continuous vertical scrolling of pages that are, to start, often cut off at the bottom and thus missing some of the text. It's why books work so much more satisfyingly than computer screens.
The side-by-side is so much better than using fineprint to imitate this, find an error, go back to NB, correct it, run another finerprint etc. So thank you for this.
|
4. Enhanced Search Options
|
A major new capability has been added to search, and a small convenience has been added:
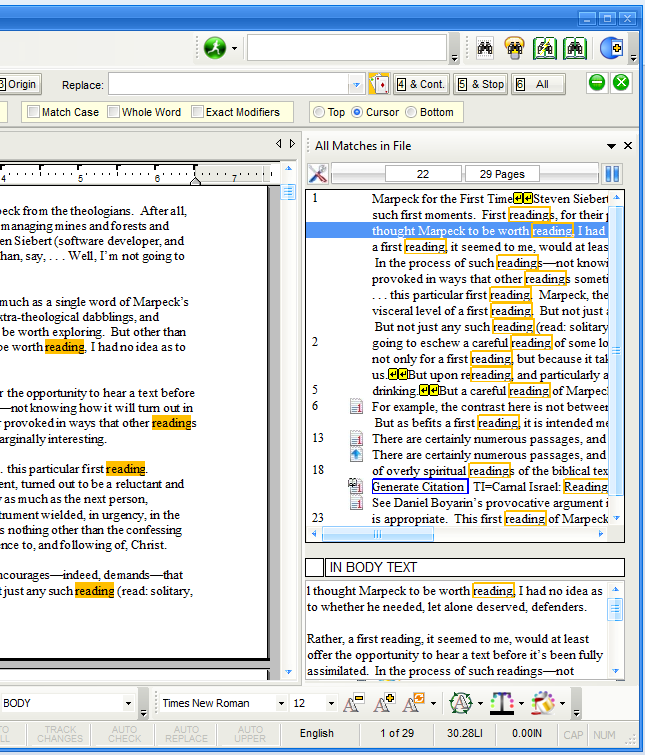
- A new Find All search option (on the Ctrl+F Find/Replace bar) lets you:
- Show all search matches in the file in a side dialog bar
- You can select which elements (notes, annotations, labels, frames, etc.) to search
- The element which contains the match is shown by an icon in the list
- A fuller preview is shown at the bottom of the dialog bar
- You can click on an item in the list, and go to that place in the file
- Highlight the terms in the file proper
- Unlike other programs, these can remain highlighted as you edit
- These two modes can be selected together, or each separately
- You can now more easily copy a highlighted term to the Find box
- If a word or short phrase is selected when the Ctrl+F Find/Replace dialog is invoked, that word/phrase will be copied to the Find box
|
|
COMMENTS FROM USERS
I wanted to say that I LOVE the new "find all" feature, with the ability to identify by page # and text snippet where in a file a particular word appears, and the ability to jump back and forth between those pages. For reorganizing sections in a lengthy chapter, this is a great feature!
This new feature is a work of genius. It is so much better implemented than the version in Word.
"While searching a right pane appears with every term used in the file listed. This is just awesome."
"[The Find All feature] is exactly what I was wishing NB could do! You're a mind-reader."
"You can add me to the list of people who LOVE the Findall feature. I would never have been able to do the notes and cross-references for my forthcoming book without it."
|
5. Note Extraction & Reinsertion
|
Nota Bene has always allowed extraction of all notes to a separate file, making it easier to view all notes for consistency and accuracy, especially during the final stages of writing. Release 2 now lets you edit these extracted notes, and then reincorporate them back into your manuscript by offering a wide range of very useful new capabilities (this feature was available 20 years ago in NB for DOS, but has now been incorporated, and greatly enhanced, for Windows):
- Extracted notes (available in all earlier versions of Nota Bene for Windows) can now be reinserted back into the source document after editing
- Note extraction produces two files:
- A file with body text, but with all note content removed (file type is N-1) and replaced by [EXTRACTED]
- A file with all the content of all the notes (file type is N#1)
- Reinsertion takes the edited notes and reinserts them back into the source document
- Reinsertion of notes has not been possible in earlier versions of NB for Windows
- While the notes are extracted into two separate files, a whole series of useful new functions are available:
- You can move notes around, without affecting reinsertion
- Notes can be deleted in the extracted-notes file (N#1), without affecting reinsertion
- Notes including Ibidem citation notes can be added to the source-extracted-notes file (N-1), without affecting reinsertion
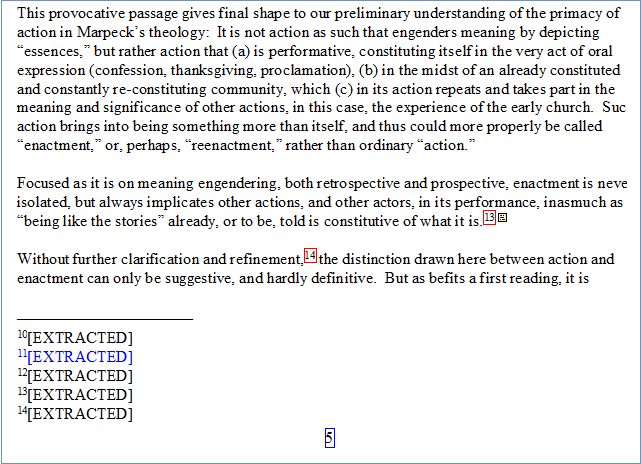
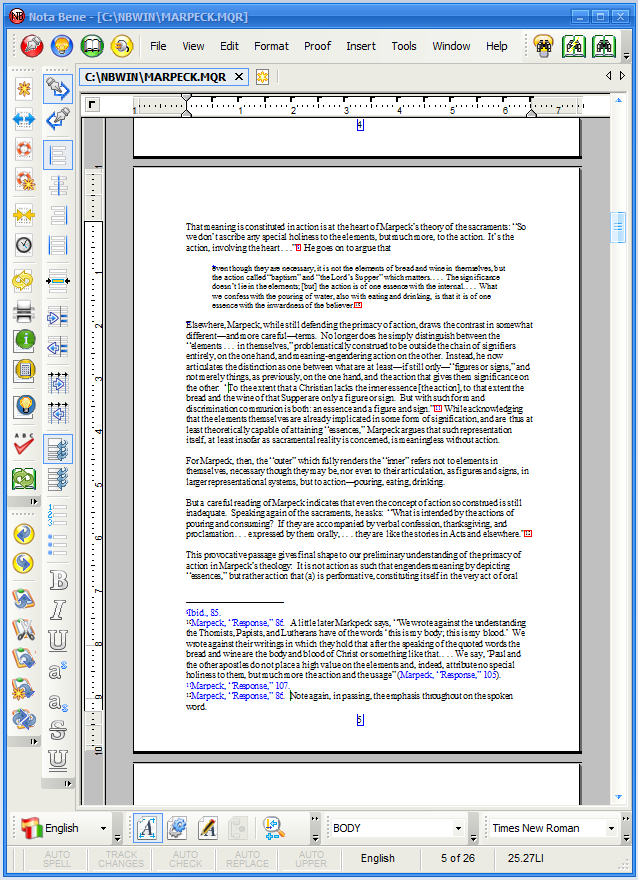
Body text of source file, with notes removed (N-1) file
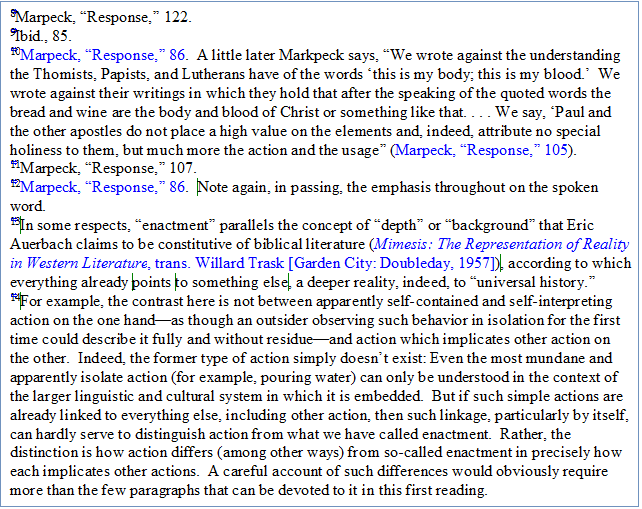
File with extracted notes (N#1) file
|
|
COMMENTS FROM USERS
THANK YOU so much for the two wonderful features - the extract and reinsert notes was sorely missed, but the new choices are very helpful indeed, and the functions works like a charm. PERFECT!
Thank you for bringing back reinsertion of extracted notes. Long missing and very useful!
"This is a dream come true, and just in time! Extracting and reinserting footnotes was something I sorely missed (it makes editing footnotes so much easier, when consistency matters) - and now it is back! It works for a book-size file with nearly 500 notes, and works without a fault. THANK YOU!!!"
Thank you for enhancing note reinsertion. This makes editing notes for consistency and duplicate information much easier.
Im finishing up the last chapter now and looking forward to the return of my favorite feature from the past: the extract and reinsert footnotes!
|
6. Print Annotations as Notes
|
Annotations become much more useful than ever rather than showing up only when you put the cursor on them, you can instantly turn all annotations into notes. You can:
- Select which annotation series to print as notes
- Specify multiple series of annotations (selecting some, and omitting others)
- Select which notes series to use
- Have them print either as footnotes, or as endnotes
- Add custom text to the beginning of each annotation note, either for general emphasis, or to distinguish them from regular notes (if not choosing a different note series)
Just as easily, you can convert them back to annotations again.
This new option makes it much easier to see whatever comments need to be taken into account as you make further edits.
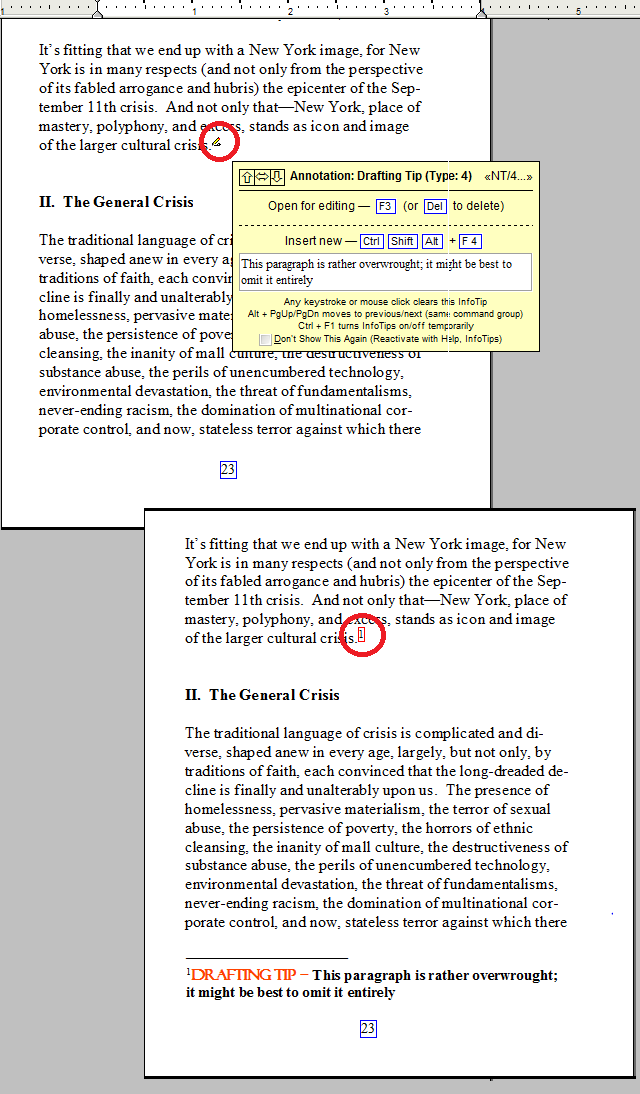 Special custom text at beginning of annotation series 4 notes
|
|
COMMENTS FROM USERS
The mechanism to output annotations (in this case, Orbis keywords) as notes (in this case footnotes, Series 2) works well in both directions. That is, output of annotations as footnotes works and the return of annotations to the NT/8 icon view works equally well. The usefulness of this new feature may become obvious when users see it: instead of hovering over each Orbis keyword icon to reveal its content, the icon is replaced by a fn call number and the fn is printed at the bottom (or as endnotes, if preferred) so you can see the annotations that had been entered on a given page all at once and referred to by number. Good research feature, good work.
|
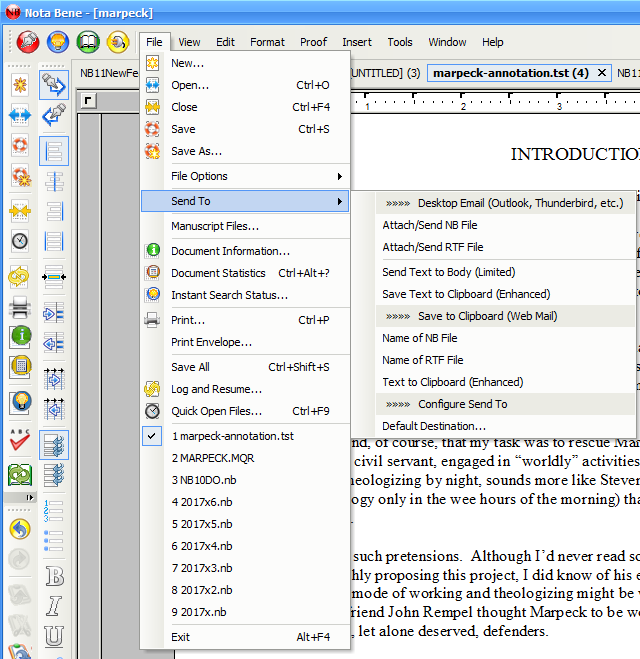
7. Send to Email or Other Program
|
A new Send To option lets you send the open file as an attachment (in either NB or RTF/Word format) to your desktop email program, or to include as regular text in the body of the email program
- If using a web mail program where security prevents directly attaching a file, the name of the open file, along with the full path, is copied to the clipboard so that it can be pasted into the attach-file box in the web mail program
- Advanced users can also configure this Send-To option to allow sending of text to other programs
|
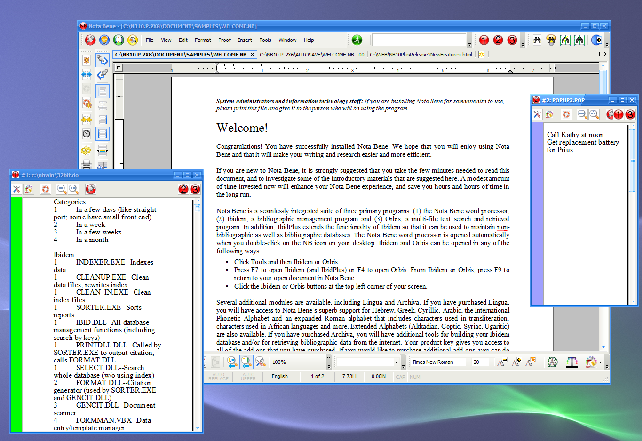
Popup files (2 of possible 3 popups shown)
NB 11offers 3 popup files little floatable Nota Bene windows that can be used for to-do lists, taking notes when reading PDF files or web pages, or for any other purpose
- There are four kinds of popups:
- Specific (named) user files
- Saved scratch pads an unnamed file where all edits are saved between sessions
- Clean scratch pad an unnamed file that is blank/reset every time it is invoked
- Linked files note/scratch files automatically created for files of particular types (you can specify the file type for these auto-generated linked files, as well as the file type of the files to which they are linked [for example, you could have NB automatically open an .NTS file to go along with all your .DIS dissertation files])
- For each popup, you have the option:
- For the contents to be autosaved when you return from the popup to Nota Bene
- To be automatically reopened when restarting NB
- To have selected text in the active NB file in which you are working be copied to the popup, without leaving the main NB window
- To have the popup be always on top, either of Nota Bene, or even in Windows in general (this lets you minimize NB without minimizing the popup, so that it can be available for use when working in other applications)
- Popups are very flexible:
- When typing in the popups, you can change print modes, switch languages, enter accents, undo/redo, and otherwise type any desired text modes
- If you want to format the text in the popups, a single click lets you transfer the file into Nota Bene, where you can use any Nota Bene formatting commands (you can then reopen the popup in the popup window with a single click)
- You can color code popups to make them easily identifiable
- You can change the zoom size of each popup
- And, of course, popups can be resized and positioned anywhere
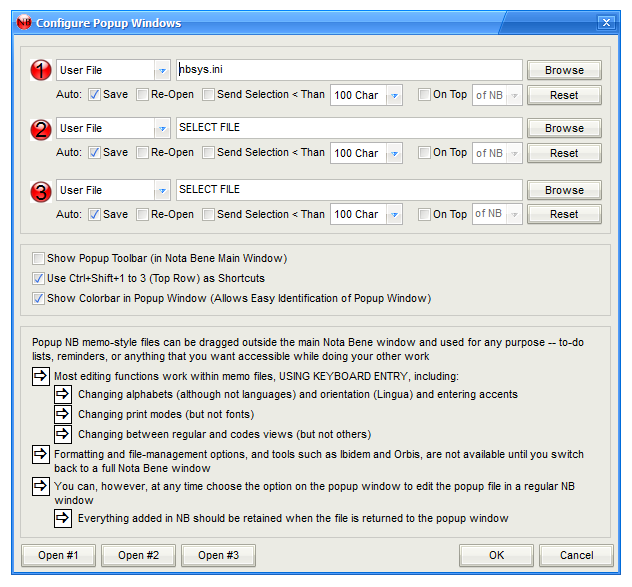
Popup configuration dialog
|
|
COMMENTS FROM USERS
... This reminds me of the old joke about the man who is so muscular he has muscles in places where other guys don't even have places! ... I just installed Release 2 ... In places where other software doesn't even have places applies especially to the popup scratchpads. Oh my gosh! 3 of them! The configurability! So far, I've set #1 to open clean every time and stay on top, for when I'm working in other programs (sometimes one must); #2 to be saved between sessions; and #3 to open an existing scratch file (which I can now remove from my Quick Open files list). And of course I can resize and place them at will, and they come up in those spots next time I open them. This is brilliant beyond words, Steve.
Thank you for the Popups (and the change to have them clickable in the menu), this is very very useful and saves all the trouble of using other sticky notes and it's seamlessly integreated, too: THANK YOU!
"The popups are working for me without a problem. In fact ... in fact ... I think I may be in love with them. Don't anyone tell my wife!
I [use] the pop-up in order to take notes while reading a .doc or .pdf file, without the full NB screen in the way.
|
9. New Color Coding of Files
|
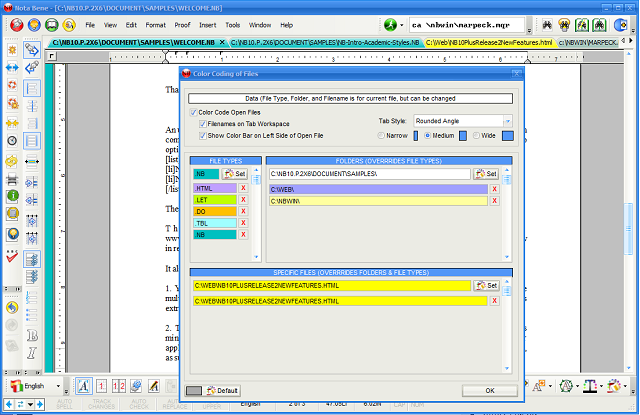 The configuration dialog to enable color coding; in the background open files are shown with the selected color (on the tab, and with the optional color bar running down the left side)
A new option has been added to make it easier to identify open files (particularly useful when you have more than a single file open at time)
- A new option allows you to color code files to enable quicker identification of particular files, folder, and types (25 options for each):
- All files of a particular file type (or extension)
- All files opened (or saved to) a particular folder
- Specific files
- The coding goes from general to specific:
- If a file is of a particular type for which a color has been selected, it uses the color of that type
- If a file is from a particular folder, it overrides any type
- If a color is assigned to a particular file, that color overrides both any applicable type and folder
- There are two options for designating colors:
The tab workspace
- A bar down the left side of the file (three different widths can be shown, depending on how prominent you want to indicator)
|
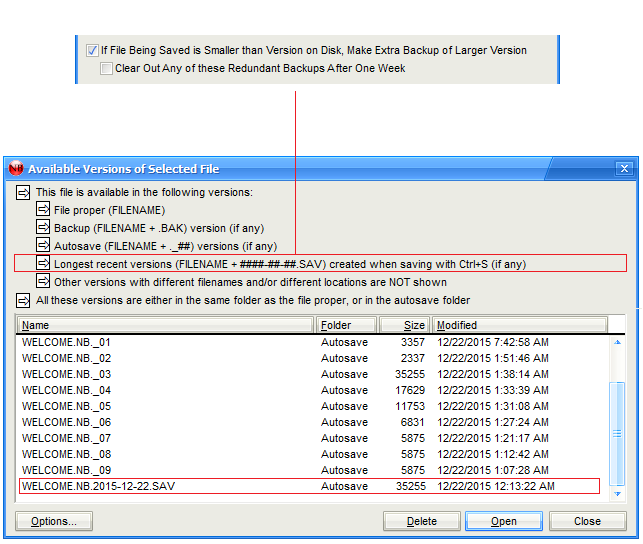
A new redundant (triple safety) file-save option has been added:
Earlier versions of Nota Bene have offered multiple ways to save your work:
- Traditional (single-copy) backups when a file is called to the screen for editing, the current version is made into a backup (.BAK file); as the file is saved during that session, all the changes are made to the active (constantly updated) version of that file
- Autosave versions (up to 99 versions for each file), made every specified number of minutes each time a file is called to the screen for editing, the most recent backup (from the previous editing session) is moved one link down the backup chain, and replaced by a new file that will be backed up at the specified interval containing the current changes; the last (oldest) file in the chain is thrown away
Now, with NB 11, another even more comprehensive option is added:
- The first time a file is saved on a given day, an additional backup is made
- This backup is updated each time the file is saved, unless the file is shorter than the currently active backup, in which case the longer earlier backup is retained
- Unlike the backup versions above, where new backups overwrite earlier backups as necessary, a new persistent backup is created each day, thus ensuring that you have access to the longest version of that file as it existed each day
- These backups can be kept around indefinitely, or you can have NB delete them after a week has gone by
This new feature is designed to prevent you from inadvertently deleting large sections of a file, and then saving and closing it, without first undoing it with Ctrl+Z to bring it back.
In addition, NB 11:
- Makes it easier to see the available versions of each file by making the list of available versions accessible via:
- Menu: File, File Options, Versions
- Right clicking on the Workspace tab, and choosing Versions
- Selecting Versions on the File Open/Save As dialog (this is the only option in earlier versions)
- Preserves autosave files (._##) for as long as possible, by reusing missing numbers in the chain before pushing the last one off the bottom
|
|


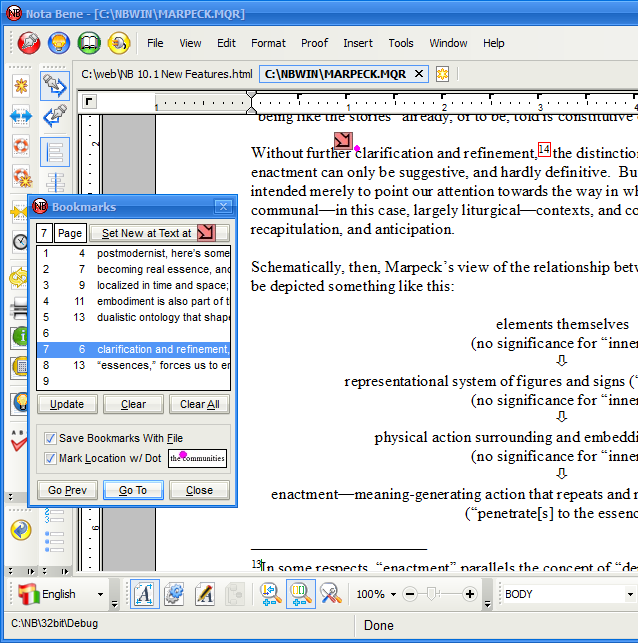
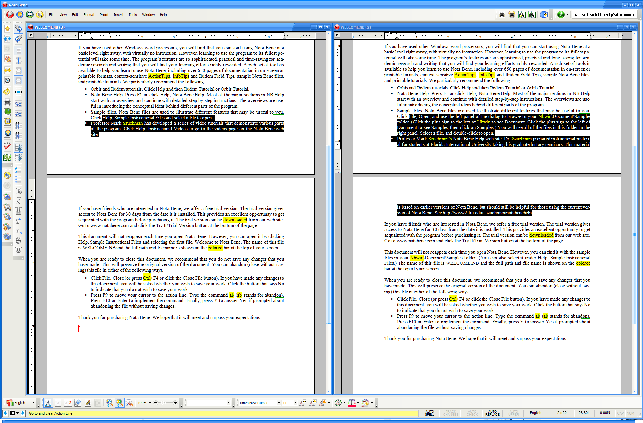 Differences between two files highlighted
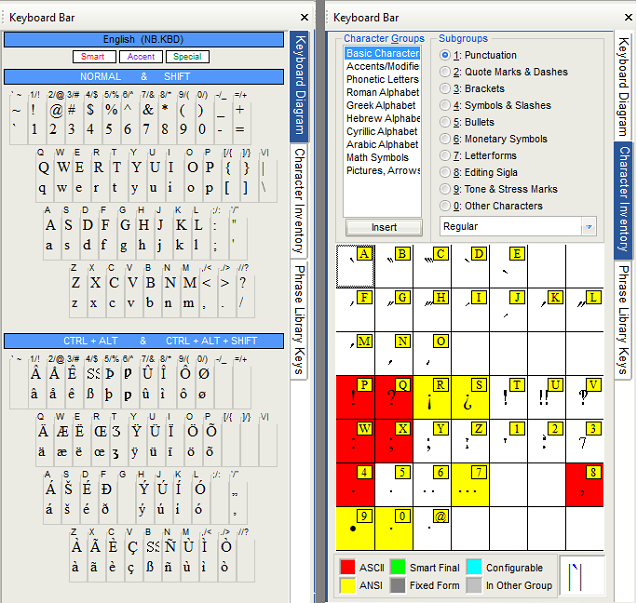 Keyboard and character-inventory tabs shown side-by-side (only one can be shown at a time); for phrase library tab, see below
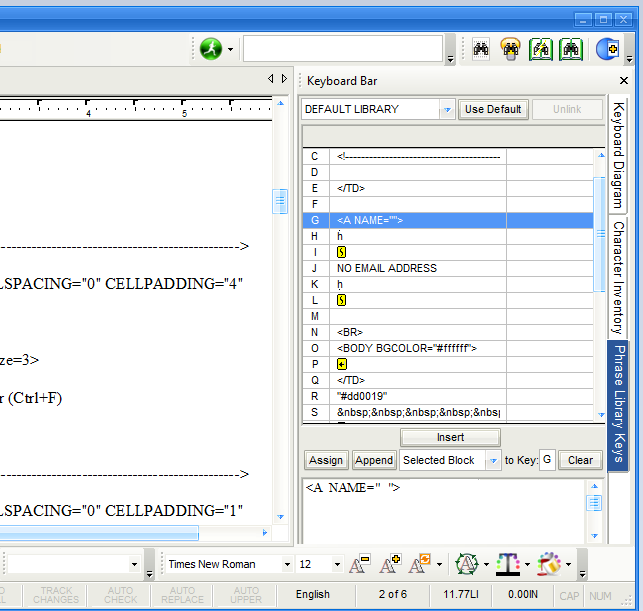 Shows a file-specific phrase library used to manually create HTML pages; when switching back to a regular academic paper, the appropriate phrase library will be automatically loaded
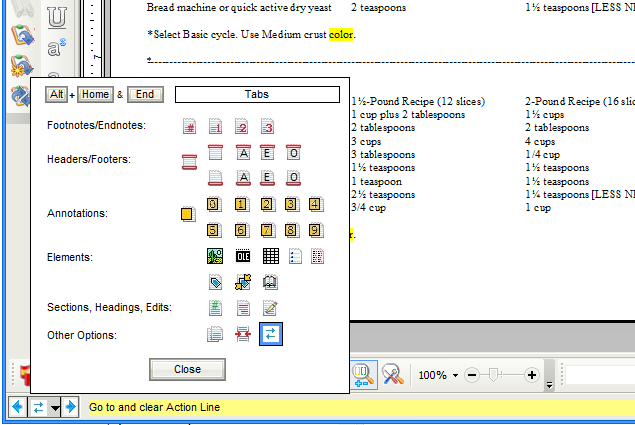 Alt + Home/End configuration dialog
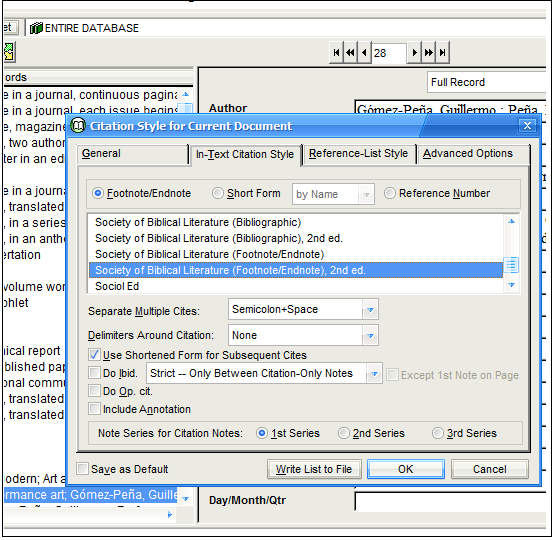 Both first and second edition styles are available
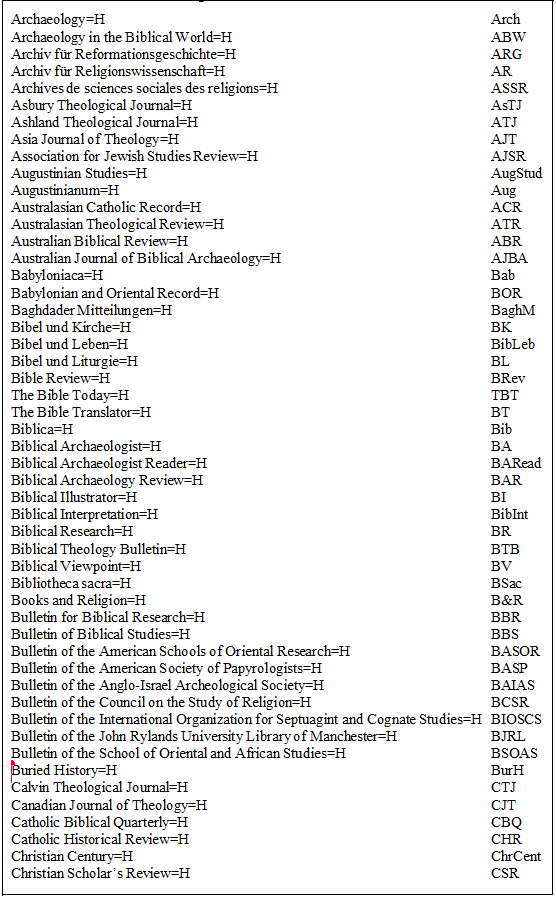 A partial selection of some of the newly added journals